Home
/ How To Build A Rocket Stove From Square Pipe - How To Build A Rocket Stove _ Fill the space with vermiculite, rockets, etc.
How To Build A Rocket Stove From Square Pipe - How To Build A Rocket Stove _ Fill the space with vermiculite, rockets, etc.
How To Build A Rocket Stove From Square Pipe - How To Build A Rocket Stove _ Fill the space with vermiculite, rockets, etc.. I would prefer using square tube, but the round one is all i have right now. Install a small diameter diameter pipe or square tubing for chamber 2 which is part and part of the heat riser for chamber 3. Use a square to position the stove pipe at a 90 degree angle, and tack weld it on one side. If you would like to know how you can make your own, today we are bringing you the wonderful selection of diy rocket stoves. It is great to use for cooking when you can't use your regular stove.
Now you can assemble them and weld it on top of the stove. Get a tin cutter to cut through metal and heavy duty gloves for your safety. Re i've a separate airflow intake in the supply pipe, this allows to stuff the pipe full with wood. The principle behind the operation of the rocket stove is quite simple: Once the hole is done, make two parallel cuts from the top to the hole.
The Winiarski Rocket Stove Manualzz from s3.manualzz.com Preferably the same size as the thickness of the flat bar. The stove body the external body of the rocket stove, as with the ecostove, can be made with clay, brick, cement, stainless steel, cast iron or sheet metal. The elbow a fire proof l shaped pipe with a 90deg bend in the middle. It made me think, why not build one out of sheet aluminum. This video is all about building my first rocket stove. To make the rack as i have, take the flat bar and drill a small hole in the center of it. This one is made from 4 x 4 square steel tubing and tig welded with stainless steel rod. Fill the space with vermiculite, rockets, etc.
Cut the coffee can so you can fit the pipe inside it.
Now comes part where you center the smaller pipe and the larger pipe so the stove functions as a rocket stove and the walls will allow for convective air flow if you want to have radiant heat. Build a rocket stove in one minute with 4 blocks! Then take a drum of any size put it over the the heat riser to make chamber 3 then install the exhaust pipe near the bottom of the barrel or chamber 3 ? Take one #10 can, and two cans that can store 28oz each, add another can to it for the shelf section. Again, let's have a look at the finished stove. For this rocket stove i'm using 8.5 inch chimney flue liner, on a bas. The two pieces of pipe were then matched up at the 45 degree cuts and welded together. Survivalist how to with 50 year old farm girlhelp support our channel on patreon: But it seems that we have some trouble with creosote in the pipe after the rocket stove in the bench. A rocket stove created by using #10 can and other scrap material makes it easy for you to build one. Fill the space with vermiculite, rockets, etc. What is important, is the combustion chamber and the insulation. Preferably the same size as the thickness of the flat bar.
Now comes part where you center the smaller pipe and the larger pipe so the stove functions as a rocket stove and the walls will allow for convective air flow if you want to have radiant heat. Shame that you couldn't do it with an 8 inch system, but it feels wrong to me. Thanks also for the wood gas stove example, it is my next goal to build such a thing in a suitable size. my bottle rocket has seperate airflow into the flue also, the fire is drawn fed with a fan on the end ot the exhaust. You could maybe get away with building a six inch system, using a rather long bench run or perhaps bell(s) before piping out the 4 inch hole. Now you can assemble them and weld it on top of the stove.
Rocket Stove Mig Welding Forum from i.ytimg.com You are ready to go! Take one #10 can, and two cans that can store 28oz each, add another can to it for the shelf section. • place the wall thimble on its side, on a level 9 inch square surface. Let me give some details on how i build it: The piece without the fuel shelf will be the chimney. Bring together your pieces and fill in insulation before sealing the lid. Found it while cleaning at home and that triggered the idea of making a stove. The stove pipe will be easier to weld to the top of the baseplate if it sticks 0 125 0 25in above the baseplate.
Here's how i made a rocket stove from some left over bits of scrap.
The bottom opening will be the air intake. Then take a drum of any size put it over the the heat riser to make chamber 3 then install the exhaust pipe near the bottom of the barrel or chamber 3 ? Survivalist how to with 50 year old farm girlhelp support our channel on patreon: Install a small diameter diameter pipe or square tubing for chamber 2 which is part and part of the heat riser for chamber 3. For testing the stove, i used some hard wood kindling and pushed them into the stove and ignited the ends of them. Preferably the same size as the thickness of the flat bar. Now you can assemble them and weld it on top of the stove. Get a tin cutter to cut through metal and heavy duty gloves for your safety. Yes i will only use it for cooking, at home but outdoors. Use a square to position the stove pipe at a 90 degree angle, and tack weld it on one side. You are ready to go! A rocket stove created by using #10 can and other scrap material makes it easy for you to build one. The two pieces of pipe were then matched up at the 45 degree cuts and welded together.
This rocket stove took muhammet sel a few hours to build, but it'll bring water to a boil in less than 10 minutes! Now you can assemble them and weld it on top of the stove. If you would like to know how you can make your own, today we are bringing you the wonderful selection of diy rocket stoves. The stove pipe will be easier to weld to the top of the baseplate if it sticks 0 125 0 25in above the baseplate. But it seems that we have some trouble with creosote in the pipe after the rocket stove in the bench.
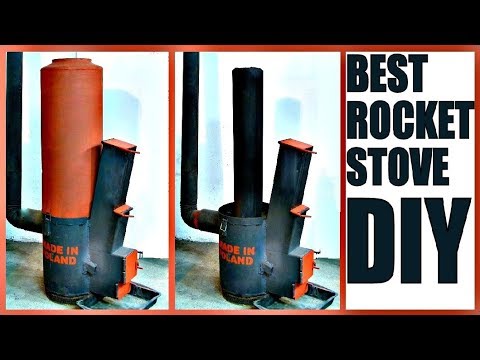
Best Rocket Stove Diy Plans Youtube from i.ytimg.com Now comes part where you center the smaller pipe and the larger pipe so the stove functions as a rocket stove and the walls will allow for convective air flow if you want to have radiant heat. Bring together your pieces and fill in insulation before sealing the lid. Repeat the process with the other piece. Having made many rocket stoves from concrete and metal, i wanted to try a new material. After seeing how simple they are, i decided to build one myself from scrap materials laying around the shop. The principle behind the operation of the rocket stove is quite simple: Use a square to position the stove pipe at a 90 degree angle, and tack weld it on one side. I would prefer using square tube, but the round one is all i have right now.
Gasses do indeed contract when they cool and stepping down in pipe size is one of the tricks that i use to keep proper flow in a long rocket stove bench run, etc.
4 square tube rocket stove building a 4 square tube rock stove in prep mode. If you can make a box out of sheet aluminum, it is a project that is doable. Gasses do indeed contract when they cool and stepping down in pipe size is one of the tricks that i use to keep proper flow in a long rocket stove bench run, etc. Fill the space with vermiculite, rockets, etc. To make the rack as i have, take the flat bar and drill a small hole in the center of it. Yes i will only use it for cooking, at home but outdoors. Use a square to position the stove pipe at a 90 degree angle, and tack weld it on one side. If you like this video hit the subscribe button. Now comes part where you center the smaller pipe and the larger pipe so the stove functions as a rocket stove and the walls will allow for convective air flow if you want to have radiant heat. 3.3 the dakota rocket stove. Let me give some details on how i build it: Insert the elbow joint into position and attach the 2 piece of pipe you just cut to the top of lid. The boiling point is somewhere around 2000 degrees.

